Creating a Font

Most probably you want to use fonts other than bundled ones. To do so you need to prepare your font of choice in a way that Mad Level Manager can read it. You’ll need a:
- Font to be installed in your operating system
- Graphics editing software (eg. Photoshop, GIMP…)
- A little patience :-)
Preparing Texture
First step is to prepare a font texture. Usually it should be created using all alphanumerical ASCII chars. Here is listing of these chars from 33 to 126 inclusive:
!"#$%&'()*+,-./0123456789:;<=>?@ABCDEFGHIJKLMNOPQRSTUVWXYZ[\]^_'abcdefghijklmnopqrstuvwxyz{|}~
There are some rules that you should follow when creating font texture:
- Try keeping its shape of square and edge width of power of 2. Unity resizes all textures to power of 2 by default to keep high performance, just don’t fight with it. 1024×1024 in most cases should be OK.
- Keep significant distance between glyphs. Texture parser will try to separate one glyph from another based on this space. Make it too small and two glyphs may be recognized as one.
- If glyphs are split to multiple lines, be aware that texture will be cut to equal pieces based on declared line numbers. For example if texture height is 128 and there are 2 lines of glyphs – pixels from 0-63 will be parsed as one line, then 64-127 as next line.
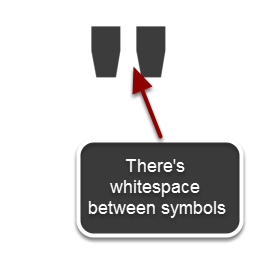
- Some characters may consists of two symbols with whitespace between them. This kind of character is quotation mark ‘"’. For these kind of characters you must do a little hack: use pencil tool in your graphics editor, set its color to font color, opacity to 5% and width around 8 pixels. Then draw a line to connect symbols. This trick will be practically invisible to end-user, and parser will parse this kind of glyphs properly.
- Font color is not really important and will be ignored by renderer. Fell free to set any color you want, but background must be fully transparent.
And here’s texture example:

Note
You can find similar fonts in your assets folder.
Creating Font Prefab
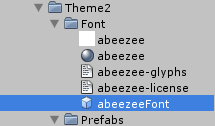
To create new font prefab you need to execute Tools → Mad Level Manager → Create Font from the main menu. New font prefab will appear in your Project view:

It’s a good idea to rename it to something more suitable:
Configuring Font Prefab
Make sure that newly created font prefab is selected, then look at the Inspector view:
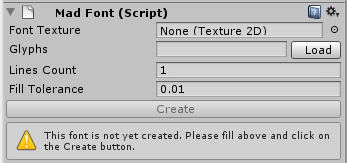
Here you can find information that font is not yet created and you need to fill in fields visible above, then click the Create button. Let’s start with the Font Texture field. Here you should place your texture that we talked about earlier.
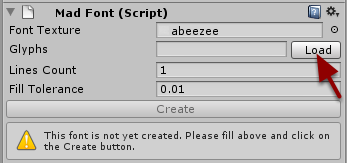
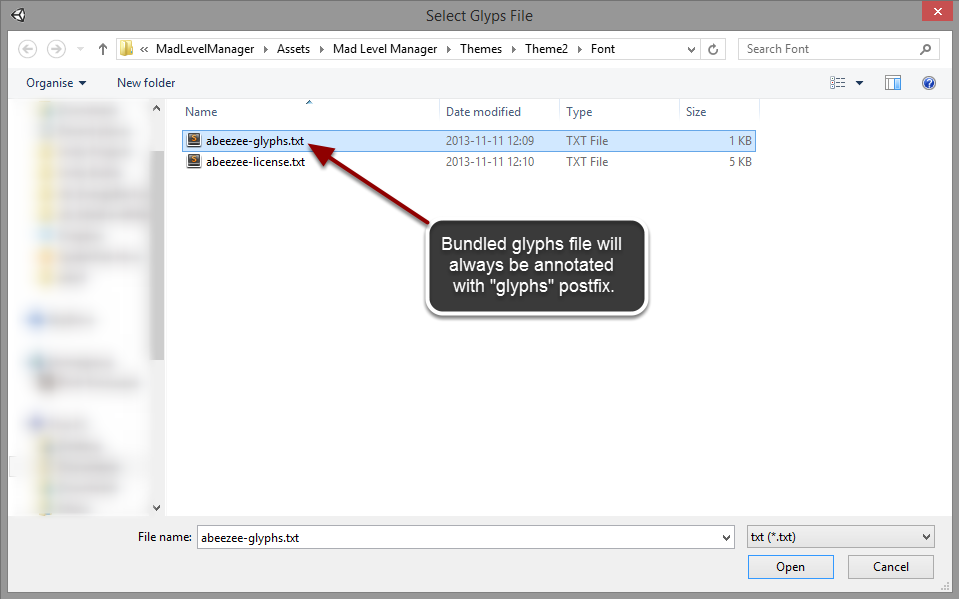
Now you should define your Glyphs. You can just copy & paste them in the field next to Glyphs label, or if you have your glyphs saved in *.txt file, load them by clicking the Load button.
Note
Note that your glyphs string shouldn’t contain whitespace characters or new lines. You can find glyph txt files in your assets folder.
And file contents should be now visible in Glyphs field:

You may notice that Create button became enabled at this moment. This means that information that we’ve provided may be sufficient to crate a font. Don’t do it now because you will receive many error that font cannot be properly parsed. This is because we didn’t set Lines Count which is mandatory in this case.
For Lines Count you should define of how many glyph lines your texture is built of. Just by looking at our texture we can easily tell that there are 8 lines. So…

Last field is Fill Tolerance. This is percentage factor of how parser should be tolerant while looking for spaces between glyphs. If you’ll find yourself in trouble when parser will merge two separate glyphs together, you can try to increase this number.
Now you can click on the Create button. When doing so you may see a message like this:

If you don’t know what it means then just click on Yes. Clicking on No will cancel font creation and you will be allowed to choose your texture format manually. After that you should try clicking the Create button again.
If you don’t see any errors in the Console or Inspector view – congratulations! Your font has been successfully crated!
In Case of Errors
Sometimes creation of font may fail. There are many cases of what may go wrong:
- Glyphs in your texture are too close to each other
- One or more glyphs with whitespace in it has been read as two separate glyphs
- Lines in your texture are not in equal distances
- You’ve defined different set of glyphs that exists in your texture (something is missing in glyphs string or in the texture)
- Your Lines Count number is different than actual lines count
- Your Fill Tolerance number is too big or too small
In that case you will receive errors & warnings in your Console view, but most important is what you can see in your Inspector view. Here you can see how parser sees your texture file:
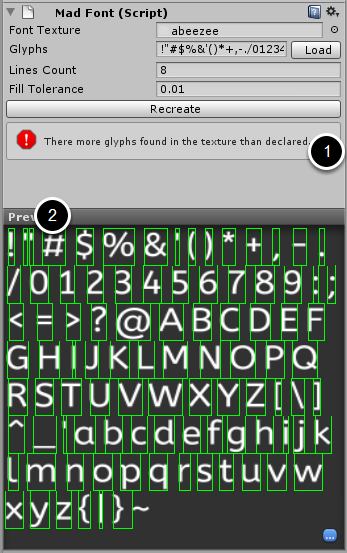
You should get to conclusions after reading error message (1) and seeing font preview with green parser markers. If you look closely at quotation mark (2) you can see that it was parsed as two separate glyphs. To fix this please refer to Preparing Texture section.