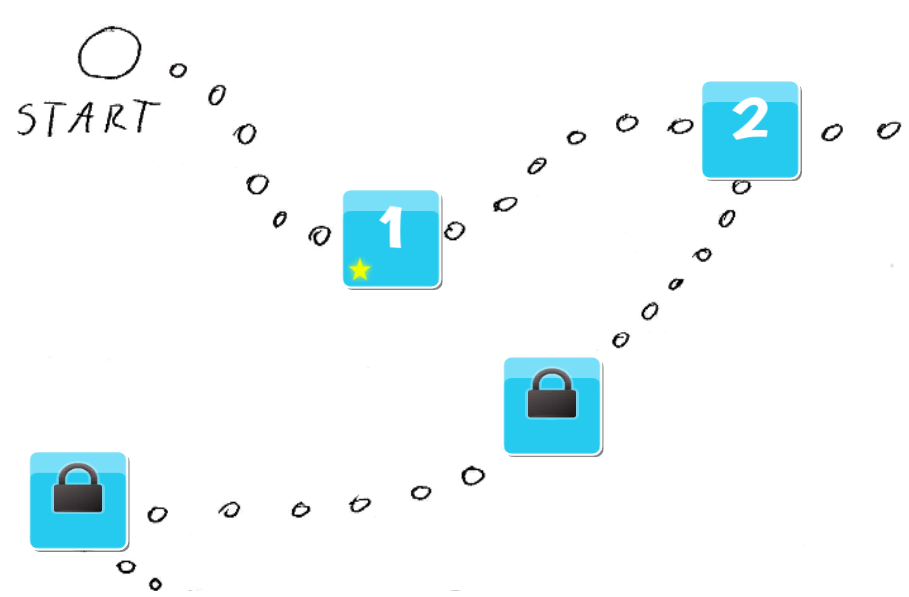
Free Layout is a layout that allows you to build level selection screen where you can freely distribute your level icons and drag on the whole area. It can be used to create maps with level icons on it.
You can see the demo here.
Setup
This documentation page assumes that you have read Creating Level Configuration tutorial and know how to setup level configuration and initialize the scene.
To create free layout, initialize new scene as described in the tutorial. Be sure to select Free as layout.
If you have your scene already initialized with a Panel, please select Tools → Mad Level Manager → Create Free Layout from the main menu. New object called Free Layout should appear. Make sure that this new object is selected and take a look at its inspector:
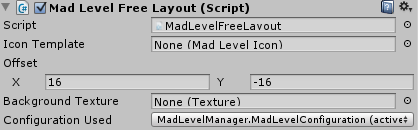
It’s much more simpler than grid layout inspector. There’s only one thing that you should set and this is Icon Template. The Offset is property useful only in edit mode. It tells how to position newly inserted icons into the scene. It’s not so important because you’ll position them as you’d like later. Background property is nice shortcut to set your own background. We will make use of it shortly. Configuration Used allows you to switch configuration that is used to create this level screen anytime you want.
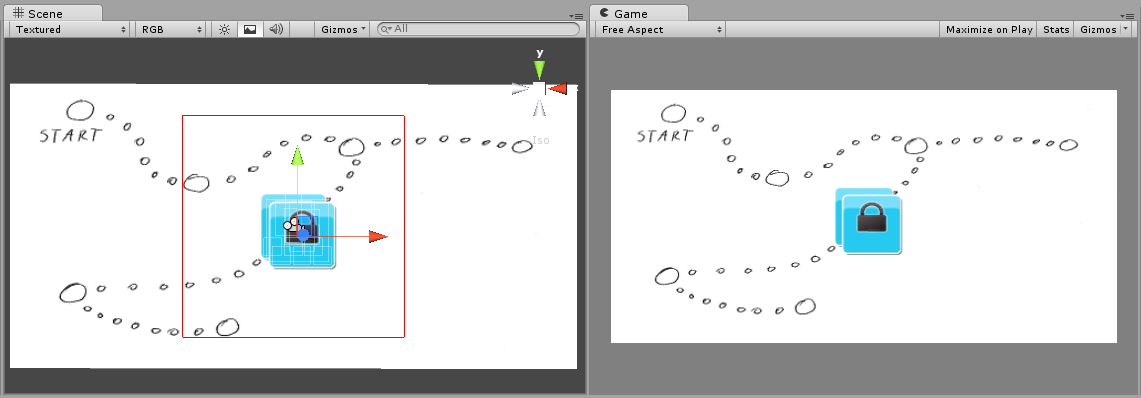
Now let’s icon put prefab icon2Prefab from Mad Level Manager/Examples/Prefabs to Icon Template field. Your Scene and Game views should be now displaying something like this:
![]()
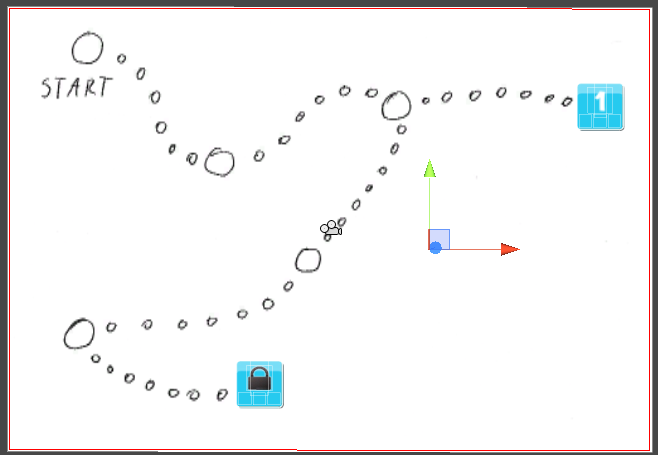
Do you see how your icons are places? Like a tile of cards. This should be information for you that they are waiting for you to place them in right positions on the screen. But how could you do that if you have no background? Locate background texture in Mad Level Manager/Examples/Textures/Examples2/free_bg.png and move it to Background Texture field:

And your Game and Scene views should now both look like this:
If you now look at original free_bg.png file you can see that the texture in Scene is too short. To test out the dragging ability let’s make it a lot bigger than it is now. To do so just select the background in Scene view, and resize it just as you would resize any other Unity object. For me the optimal x, y scale was 1.6, 2.2.
Positioning
Let’s now position our icons in the right places. You can select icons just by clicking on them, but there’s high risk that you would select sprites that lies underneath. Easier and safer way to select the icon is to use Hierarchy view:
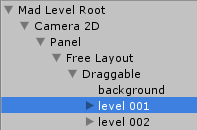
Move your icons anywhere you’d like to move them. My favorite configuration looks like this:
![]()
Drag Area
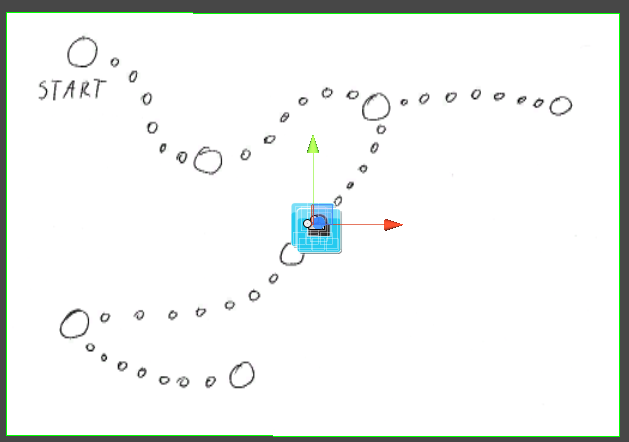
There’s one more thing to setup before your level select screen will work. Have you noticed the red rectangle in screenshots above? This is the drag area and it need to be configured too. Please select the Draggable object from the hierarchy:
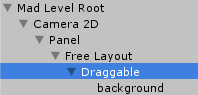
And look at the Inspector view. You should see configuration of drag area and start position:
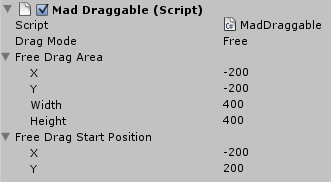
Now try to change Free Drag Area and see how your scene view is updated. Try to find out which values that will closely match bounds of your background. Hint: setup x and y first to set the rectangle in lower-left corner.
Testing it
Now you can hit the Play button and if you did everything right you should now be able to drag through the map, select levels and complete them. You can reset your progress any time using Profile Tool.