Setup Template
In order to create grid of level icons you must create template of one of these icons. Here’s the instruction how to do it.
- First make sure that your Scene is initiallized correctly. It should contain Mad Level Root objects in the Hierarchy. If not please use the Init Tool in Tools → Mad Level Manager → Init Tool.
- Make sure that your Scene view perspective is placed correctly. Select Camera 2D from the Hierarchy and then execute Edit → Frame Selected from menu or hit the F key on the keyboard.
- Then select from the menu Tools → Mad Level Manager → Create Level Icon . This will appear:
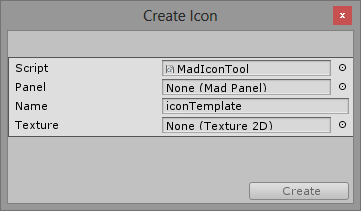
- In Panel field select Panel from the scene. It’s nested under Level Manager Root/Camera 2D.
- Leave name as iconTemplate.
- Select texture icon.png. It’s located in Mad Level Manager/Examples/Textures/Example1/icon.png .
- Submit by pressing the Create button.
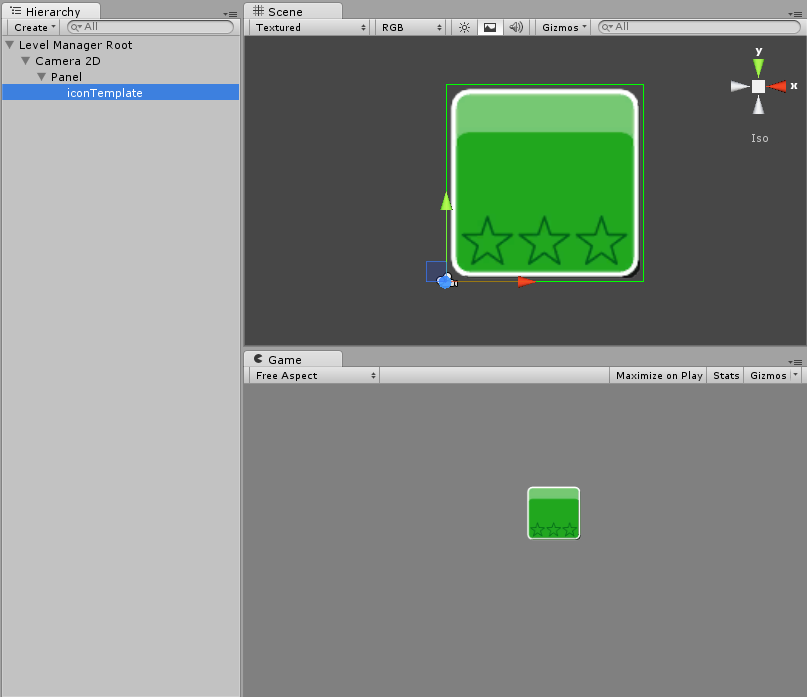
Now you should see iconTemplate object created under the Panel. Also in Scene and Game views. It should look something like this:
Create Properties
Properties are one of the most important things about level icons. Properties are just simple boolean state values (true or false) that every icon can contain. It can be for instance completed state, state of star possession (for 3 stars there will be 3 properties) or locked property. We will setup all of them.
Properties can exists without player knowing about them. These types of properties are called Empty Properties. Other types are Sprite and Text Properties, when enabled sprite or text is displayed.
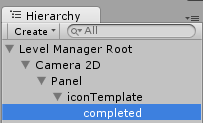
Completed Property
Let’s try the simplest thing. When level is completed we won’t display any special information on the screen but unlock next level. It’s mandatory to setup completed property on icon template. This is how to do it:
- From the main menu select Tools → Mad Level Manager → Create Level Property → Empty . This window will open:
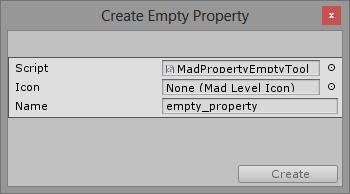
- For Icon select iconTemplate created earlier.
- Name it completed.
- Submit by pressing Create button.
You should see new property created in Hierarchy.
We will leave it as is for now.
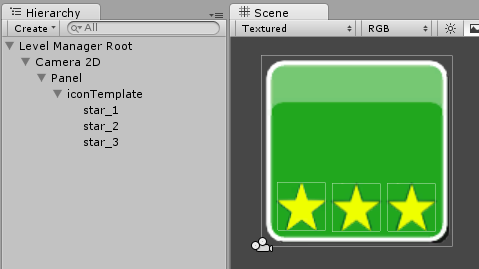
Stars Properties
Level properties are graphical aspects of level icons that can change, be visible, or not. Our iconTemplate contain 3 placeholders for stars. Let’s now create star property.
- From the main menu select Tools → Mad Level Manager→ Create Level Property → Sprite. The wizard will open:
![]()
- For Icon select previously created iconTemplate.
- For Name enter star_1
- For Texture select icon_star.png located in Mad Level Manager/Examples/Textures/Example1/icon_star.png.
- Submit by pressing Create button.
Now you should see star icon on your scene:
![]()
- Position it above first placeholder.
- Duplicate it (Ctrl + D) and rename to star_2
- Place new duplicate above second placeholder.
- Do the same and name third one star_3.
Your scene should look like this:
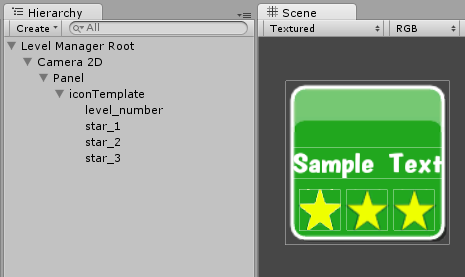
Level Number Property
Now let’s create level number property to distinguish one level from another on the final screen. In order to do so you must:
- Open Text Property Tool by activating menu item Tools → Mad Level Manager → Create Level Property → Text . The window will open:

- For Icon select previously created iconTemplate.
- For Name enter level_number.
- For Font select boogaloo.prefab located in Mad Level Manager/Examples/Fonts/Boogaloo.
- Submit by pressing Create button.
Now your scene should look like this:
Next:
- Select level_number on the Scene view or Hierarchy.
- In its inspector change Text to “1”
- Change Scale to 90
- Adjust its position to match the preview below.
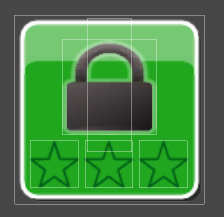
Locked Property
We want to lock out levels for the player until he completes the previous ones. For instance level two will be locked until level one is resolved. To do this let’s create locked property:
- Disable level_number property for now. Re-enable it after finishing creating lock property.
- Select from the menu Tools → Mad Level Manager → Create Level Property → Sprite .
- For Icon select iconTemplate from Hierarchy.
- For Texture select lock.png located in Mad Level Manager/Examples/Textures/Example1 .
- Name it locked.
- Submit by pressing Create button.
- Adjust locked position to look like this:
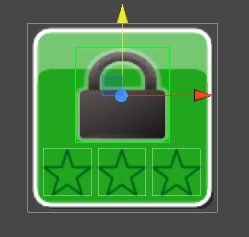
Now re-enable disabled level_number. You will see that displaying level_numer among with locked property doesn’t look so good. It will be nice idea to not displaying level number when level is locked and show it after level is unlocked. You can set this up easily by configuring locked property:
- Select locked property in the Hierarchy
- In the Inspector find Show When Disabled list.
- Move level_number property from the Hierarchy to Show When Disabled list.

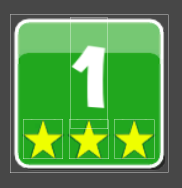
Final Touches
Icon template has some special properties in the inspector to help to prepare our scene quicker. Let’s set them now:
- Click on iconTemplate in Hierarchy view.
- In Inspector find Level Icon section.
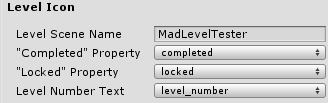
- For Level Scene Name enter MadLevelTester. This is name of scene that will help testing if our level choice screen is behaving as expected.
- For Completed Property select completed
- For Locked Property select locked
- For Level Number Text select level_number property.
And one last things:
- When iconTemplate is still selected…
- Find section Properties in its Inspector.
- Disable completed, level_number, star_1, star_2, and star_3 by clicking Disable button next to each property name.
- Be sure to leave locked property enabled.
![]()
And this is the final appearance of our template. Please notice that it’s default appearance of level tile – when it’s locked.