Layout API is a brand new feature of Mad Level Manager 1.4.0. It gives you great control over level select screens. You are able to:
- Access icons
- Activate icons
- Control the camera (look at level)
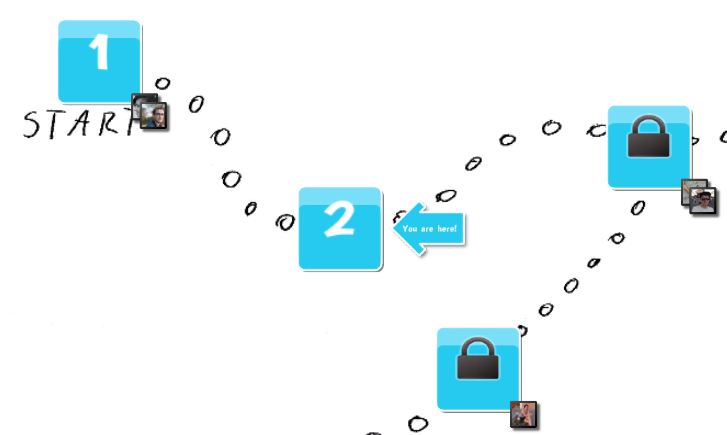
With these features you can place your own dynamic content over generated level icons. To give you an idea, please look at this example. This is common usage for player avatars in many community games.
Accessing the layout
Layout API can be accessed using MadLevelLayout class:
var layout = MadLevelLayout.current;
It will return current layout object. You can look at its API here.
Avatars Example
The best method of explaining how Layout API can be used it through an example code. Do you see avatars example image above? This example is using AvatarsExample.cs script. You can download it and use it freely. Now let’s describe how it is done.
Fields
// avatar array
public Texture2D[] avatars;
// position modifier for avatar stacking
public Vector3 stackingModifier = new Vector3(12, -12);

// depth counter
int depth = 100;
// stacking counter
Dictionary<MadLevelIcon, int> stackCounter = new Dictionary<MadLevelIcon, int>();
Here we’re giving into the inspector (public) avatars textures and stackingModifier. The second one helps to display multiple avatars over single icon. Next is depth counter and stackCounter to help to count how many avatars are set for each icon.
Start() method
void Start() {
    if (avatars != null) {
        foreach (var avatar in avatars) {
            var icon = RandomIcon();
            AddAvatar(avatar, icon);
        }
    }
}
Nothing magical here. For each avatar icon we’re getting RandomIcon() and then executing AddAvatar() with it.
RandomIcon() method
 1 // gets the random displayed icon
 2 MadLevelIcon RandomIcon() {
 3     var layout = MadLevelLayout.current;
 4     var levels = (from l in MadLevel.activeConfiguration.levels where l.type == MadLevel.Type.Level select l).ToArray();
 5
 6     var randomLevelName = levels[Random.Range(0, levels.Length)].name;
 7     var randomIcon = layout.GetIcon(randomLevelName);
 8
 9     return randomIcon;
10 }
- Line 3 – We’re taking layout object to use it later.
- Line 4 – By using linq expression we’re constructing an array of levels of type MadLevel.Type.Level (this is the type of playable levels, and only these are displayed on level select screens).
- Line 6 – By using Random.Range() one random level is selected.
- Line 7 – layout.GetIcon() with level name as parameter returns MadLevelIcon object.
AddAvatar() method
 1 // adds avatar to icon
 2 void AddAvatar(Texture2D avatarTexture, MadLevelIcon levelIcon) {
 3     var draggable = GetDraggable();
 4
 5     // creates avatar sprite under the draggable
 6     var sprite = MadTransform.CreateChild<MadSprite>(
 7         draggable.transform, "avatar " + avatarTexture.name);
 8
 9     sprite.texture = avatarTexture;
10     sprite.guiDepth = depth++;
11
12     sprite.transform.localPosition = GetAvatarLocalPosition(levelIcon);
13 }
- Line 3 – GetDraggable() method (in the same script) will give us access to draggable object. It’s very important to create sprites under draggable, because this object is responsible for all dragging transformations. All icons are already located under the draggable.
- Line 6 – We’re using helper MadTransform.CreateChild() to create new MadSprite object under the draggable.
- Line 9 – Assigning avatar texture.
- Line 10 – Assigning and increasing the depth (for the next icon).
- Line 12 – Assigning proper local position using GetAvatarLocalPosition() described later.
GetAvatarLocalPosition() method
1 // gets the local position for avatar
2 Vector3 GetAvatarLocalPosition(MadLevelIcon icon) {
3     var bounds = icon.GetBounds();
4     var localPosition =
5         icon.transform.localPosition
6         + new Vector3(bounds.width / 2, -bounds.height / 2, 0)
7         + GetStackModifier(icon);
8     return localPosition;
9 }
To get avatar position we have to calculate icon bounds. Note that on the line 3 we’re not using renderer.bounds, because sprites of Mad Level Manager doesn’t have the Renderer component! GetBounds() will return a Rect with bounds in local space.
Try it yourself!
You can download this example here. You need to have Mad Level Manager 1.4.0 (or greater) unpacked in your current project.