While using Mad Level Manager you can find several icon templates that can be used in your game, but most probably at the end you want to create your own customized icon template. Here you can learn how to do it.
For presentation purposes I will use example textures that are provided with Mad Level Manager package.
Basic setup
- The best approach to create a new icon is to do it on completely new scene. Create a new scene (CTRL + N) and remove the Main Camera from it.
- Execute from the main menu Tools → Mad Level Manager → Init Tool. You will see:
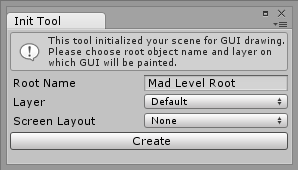
- Make sure that Screen Layout is set to None and press the Create button. Scene will be initialized with Mad Level Root object.
- Execute from the main menu Tools → Mad Level Manager → Create Level Icon . The Create Icon wizard will appear:
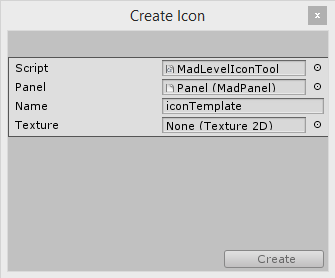
- Select the texture icon to icon.png. It can be found in Mad Level Manager/Examples/Textures/Example1/icon.png .
- Submit by pressing the Create button.
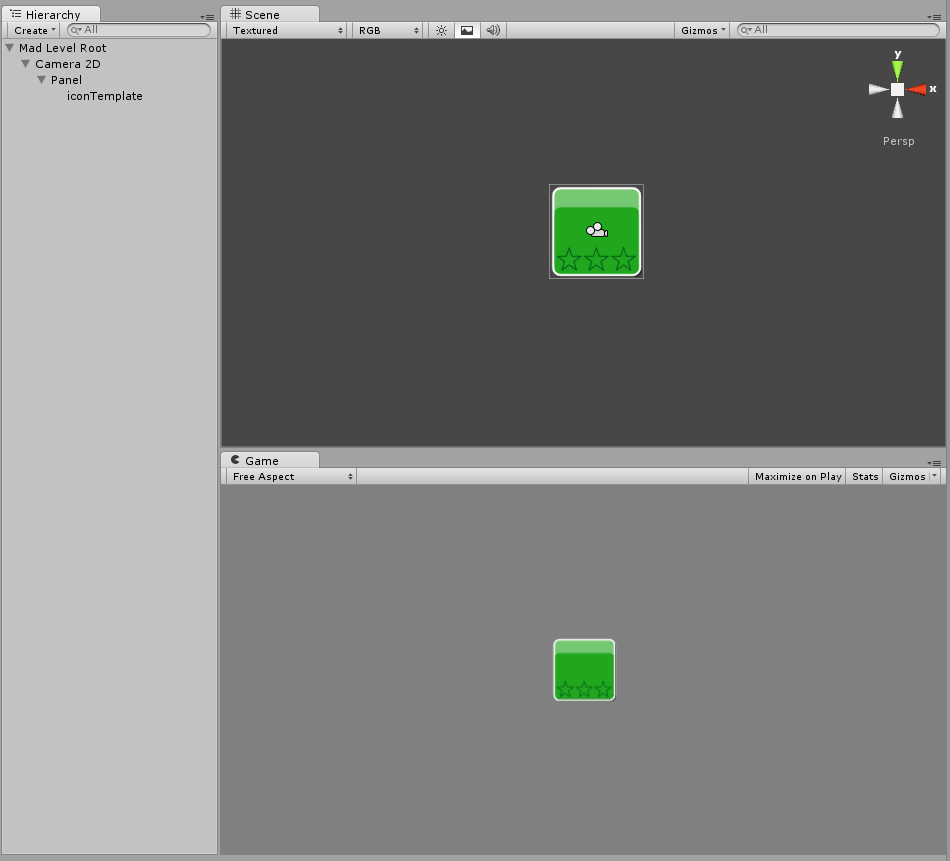
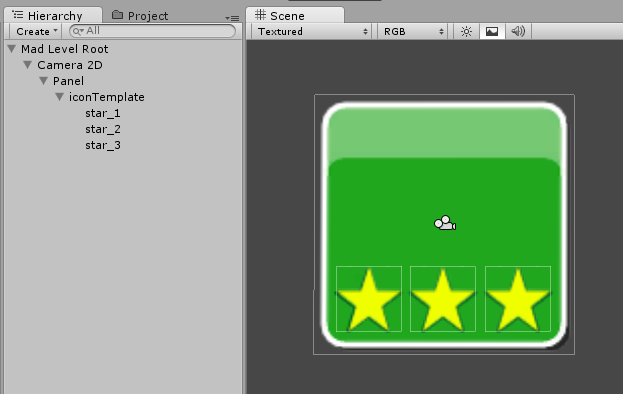
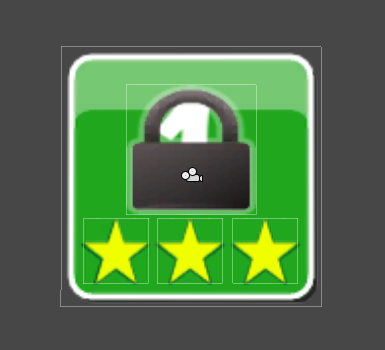
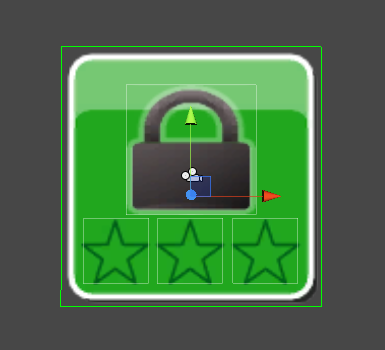
Now you should see the iconTemplate object created under the Panel. It should look something like this:
Create properties
Properties are one of the most important things of level icons. They are (in most cases) sprites that visibility are based on current game state (like number of collected stars). Properties can be:
- Star icons that are visible when player gained some meaningful score.
- Lock icon that is visible when level is locked
- Level number label that will display level number (in order)
Properties are persistent and can be set using Save & Load API
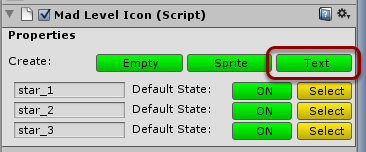
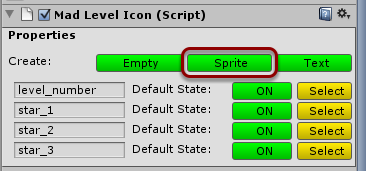
Select your iconTemplate object to see what types of properties you can create:
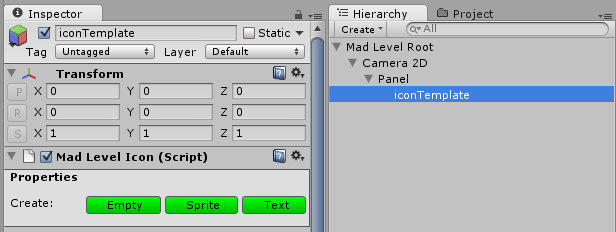
These are:
- Empty – this is just a game object that is enabled/disabled based on current property state.
- Sprite – displaying a texture when enabled
- Text – visible when enabled, can display other property value or level number
Let’s now create stars!
Stars properties
In order to create a star property, just click on the Create: Sprite button in the icon inspector. New sprite property will be created and selected:
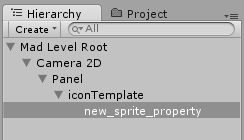
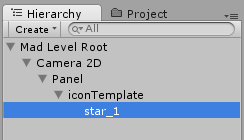
Rename it to star_1:
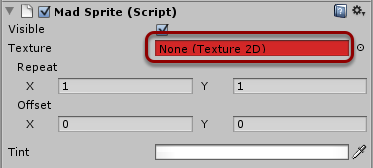
Now look in the inspector and find place where you can set up the texture:
And set it to icon_star.png that can be found in Mad Level Manager/Examples/Textures/Example1/icon_star.png.
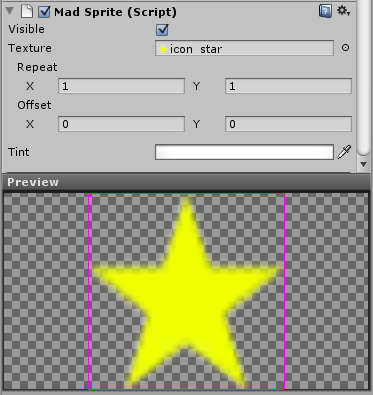
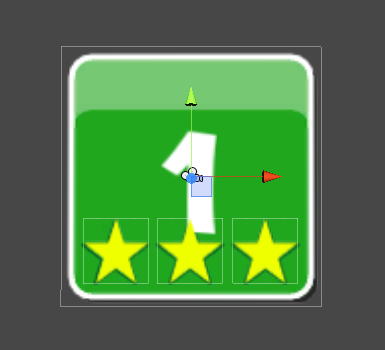
Look at the scene view. You should finally see your first property:
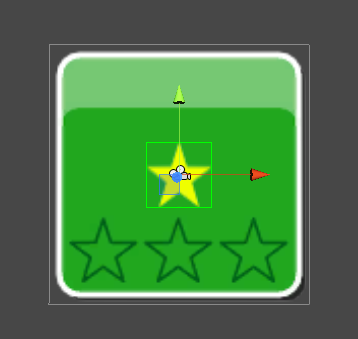
Move it to the right place:
Now create two remaining star properties. You can do it the same way, or just duplicate (CTRL+D) the first star and name them star_2 and star_3. The result should look like this:
Level number property
Now let’s create level number property to distinguish one level from another on the final screen. Please select your iconTemplate object and in the inspector click on the Create: Text button:
A new property will be created as before. Call it level number and find in the inspector place when you can set the font and text values.

- Set the Font to boogaloo* that is located in Mad Level Manager/Examples/Fonts/Boogaloo.
- Set the Text to 1 (one)
- You may also need to adjust the scale. I set the Scale value to 90.
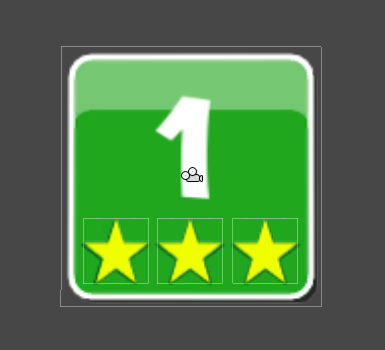
Your scene view now should look like this:
Adjust the text position and it’s done!
Locked property
One last thing to set is the locked property. You may want to lock your levels and unlock them on player progress. Let’s set it up now!
Create another sprite property just like you did with the star icon using Create: Sprite in iconTemplate inspector:
Name it locked and set the Texture to lock.png that can be found in in Mad Level Manager/Examples/Textures/Example1.
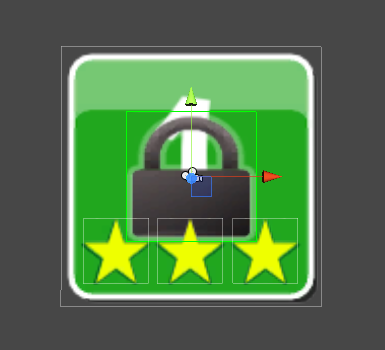
Adjust its position and you’re done here!
Connecting logic
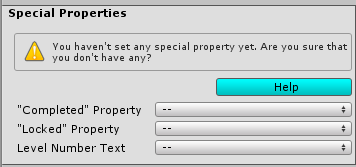
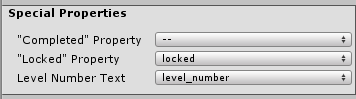
How Mad Level Manager knows when to display locked property, or which property is level number property? It doesn’t! You have to setup which properties are special. To do this go to iconTemplate inspector and find section that is called Special Properties:
From the dropdown menus choose:
- locked as Locked Property
- level_number as Level Number Text
Setting default state
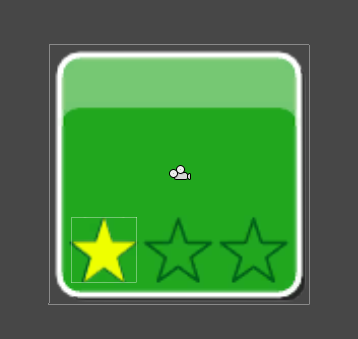
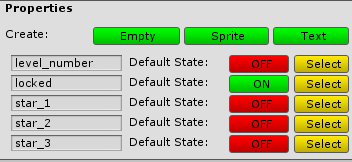
How your icon should look by default? Which properties should be enabled and which shouldn’t? It’s up to you, but we want all start to be disabled (because player doesn’t have any stars by default) and level should be locked. Let’s look at the iconTemplate inspector:

Pressing the green buttons will change the default state. Now disable all stars and the level number:
Do you see how your icon is looking now? Nice!
State connection
Probably you want to enable level_number when locked property is disabled (level is unlocked). To do that select the locked property and look at its inspector:
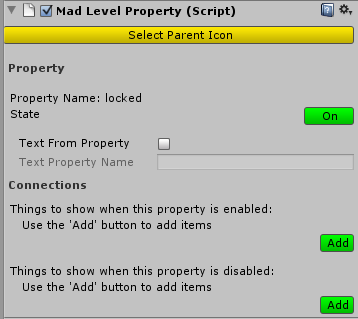
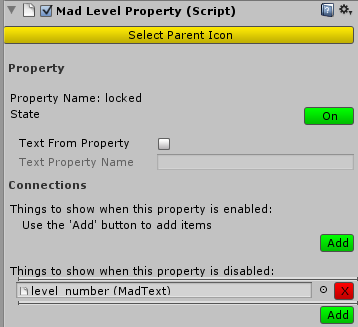
Here you can link which properties should be shown when this (locked) property is disabled. Click on the second Add button and put your level_number there:
Go back now to iconTemplate and notice something:
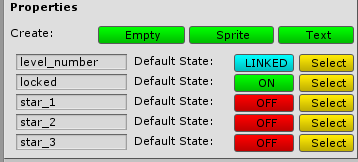
Do you see that level_number state has changed to LINKED? This means that you can no longer change its state, because it is linked to locked property. You can click on LINKED button to see the linkage information (to find out the other end of this connection).
Finished!
And you’re now ready to create a prefab! Just move your iconTemplate object to new empty prefab and you can use it freely in you level select layout!