Mad Level Manager is a Unity3D extension to help you manage your levels, and prepare elegant level select screens based on your level configuration. It’s easy, powerful, highly customizable, and under active development.
Level Management
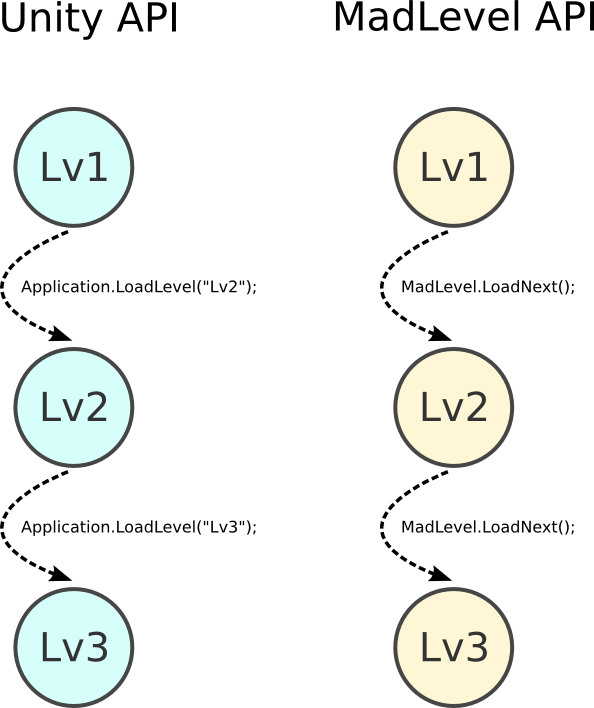
If you’re experienced Unity3D developer, and you are familar with scripting then normally you would use Application.LoadLevel() function when you want to load next scene. This seems simple enough, but there are some issues with this approach:
- You need to know scene name or index of scene that you want to load
- There’s no simple method of passing arguments to a scene
- Managing multiple level work flows is not a simple task
Let’s talk about these issues one by one.
You need to know scene name or index of the scene that you want to load
You may say “Hey! But I know the names of my scenes!”. That’s fine until your scene name won’t change. The order can change too, and when it does you need to find each place where you’ve used Application.LoadLevel() and change your scene name. In bigger projects it can be quite painful.
In Mad Level Manager your scenes don’t need to know about each other. Instead of saying “I want to go to level 6” (while being in level 5) you can say “I want to go to the next level”. This will make your development process much easier, because you’re free to change your level work flow without changing anything in your code! It cannot be simpler!

What’s more, Mad Level Manager will take your understanding of scenes to the higher level. In Mad Level Manager The Level is an entity that:
- Have it’s own name (don’t confuse with scene file name)
- Directs you to a scene (multiple levels can direct you to the same scene)
- Have it’s own type (regular level, extra level, other)
- Have input arguments
There’s no simple method of passing arguments to a scene
A common case when you’re building a game with many levels is to create one scene for all of these levels. When its done you’re finding a way to tell the scene to load contents for the selected level (most probably from the input file). You can find that this approach in commonly used in all sort of puzzle games. All levels consists of a board, and this board must be filled with objects. This is where you need to pass arguments to your level. Again this is not straightforward task, because Unity doesn’t provide method to set input arguments for your scenes.
Mad Level Manager lets you set argument line for each of your levels in the level configuration tool. Then this argument line can be easily accessed by MadLevel.arguments property.
Managing multiple level work flows is not a simple task
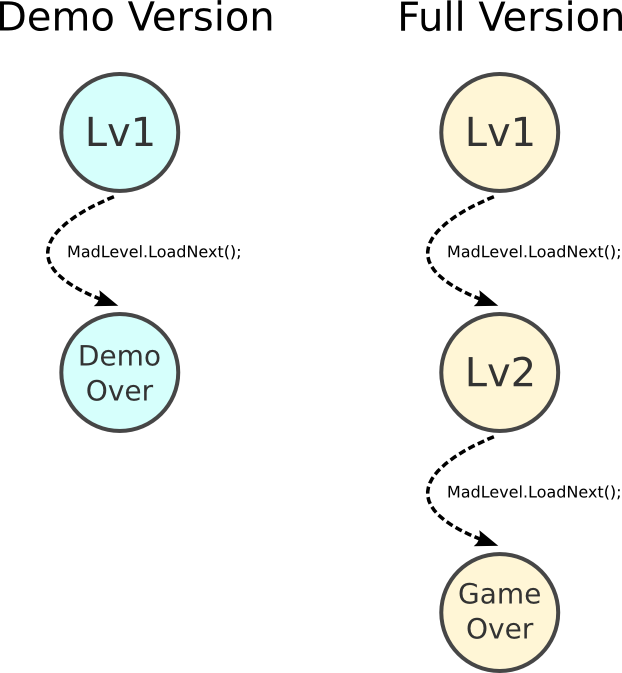
For example let’s say that you want to create two versions of your game: demo and the full version. Both of these should contain first level, but only the last must allow to play the second one.
It’s easy to achieve this with Mad Level Manager level configurations. You just need to create two configurations, and just before building your application switch between first and the second one. In that way you can quickly create two different versions of your game!

Level Select Screen
Create level select screens in no time. It’s based on your previously prepared level configuration, and it will update automatically if you add, remove or change your levels work flow. These screens are working great with any mobile device, as good as with PC, Mac & Linux!
Also level select screens are integrating with save & load subsystem. If you set your level as unlocked or completed, it will be immediately visible on the screen. If you will define additional properties for your level icons like stars, Mad Level Manager will fill them up.

Load/Save and Profiles Support
The third most important functionality of Mad Level Manager is built-in save/load system and support for player profiles. By using MadProfile API all changes made to level states are persistent and will be loaded and displayed at the level select screen automatically. You can create multiple player profiles and switch between them whenever you want. It’s easy, powerful, and safe.

