What you need to know
Here’s the list of things that you need to know before reading any further:
What is Grid Level Selector?
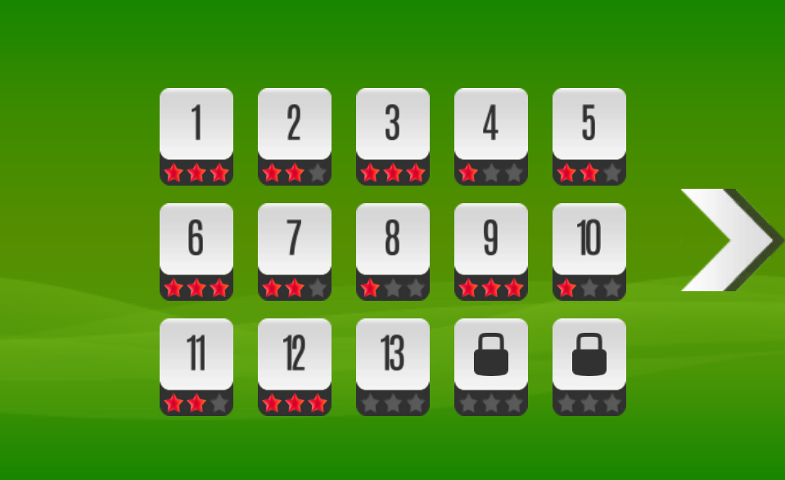
Grid level selector is a level selector that arranges level icons in grids and pages. Multiple pages are created if the number of levels exceeds grid capacity. For example if you have 27 levels and you want to display them on 3×3 grid, three pages of nine levels will be created.
You can find a demo of Grid Level Selector here.
Initialization
In order to create grid layout, initialize new scene as described in this tutorial. Please be sure to select Grid as Screen Layout.
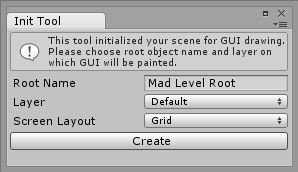
If you have your scene already initialized with a Mad Level Root, please select Tools → Mad Level Manager → Create Grid Layout from the main menu.
Right after the initialization, the grid should be filled with example sprites. If not, please make sure that Mad Level Manager is unpacked in the default location (root of your Assets folder).
Setup
New object called Grid Layout should appear (it can be found in the Hierarchy: Mad Level Manager / Panel / Grid Layout). Make sure that this new object is selected and take a look at its inspector:
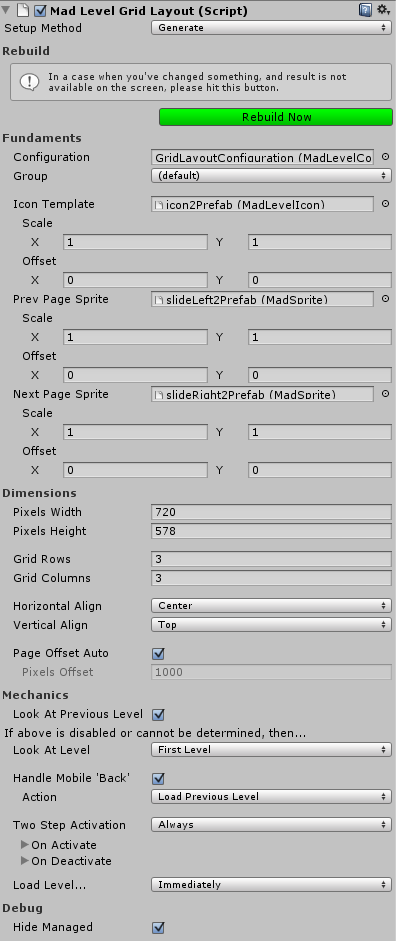
As you can see it is quite a big thing. Don’t worry, you don’t have to change everything. In most cases, default values will do best but you have the ability to fine-tune the behavior of the layout.
For the purpose of organization it is split to several sections. Let’s start from the top.
The top & rebuilding
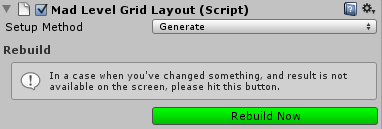
At the top you can see the Setup Method. Grid layout can be configured using two setup methods:
Setup method: Generate
All icons will be generated from the template or prefab. This is the simplest and the most common setup method. Even if you want to use Manual setup method in some point of time, you should start with this one to generate start positions for your icons.
Pros:
- Very easy to maintain.
Cons:
- You cannot (shouldn’t) modify icon instances in any way.
Setup method: Manual
New icons are generated from the template or prefab, but the existing ones are not modified by the script. This allows you to customize individual icon instances as you wish.
Pros:
- You’re allowed to modify icon instances
Cons:
- More difficult to maintain.
Fundamentals section
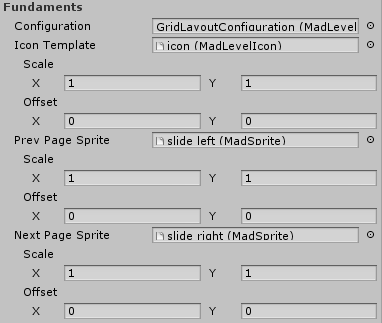
Here you can set most basic properties of the grid layout.
- Configuration – This is the Level Configuration that should be used to build this grid. All levels of type Level will be represented as an icon in the given order.
- Icon Template – Prefab (recommended) or scene object of icon that should be instanced for each level.
- Scale – Scale of icon instances.
- Offset – The offset for each icon instance.
- Prev/Next Page Sprite – Prefab or scene object of slide graphics (touching them will switch to the next or previous page).
- Scale – Scale of these graphics.
- Offset – The offset of these graphics.
Dimensions section
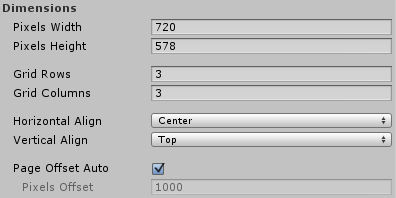
- Pixels Width/Height – Grid page size in pixels.
- Grid Rows/Columns – Number of rows and columns.
- Horizontal/Vertical Align – Align of icons on grid. In case when grid is not filled up, icon will be aligned in given manner.
- Page Offset Auto – When enabled, page distance will be calculated from the screen resolution (x = Screen.width).
- Pixels Offset – Manual distance between pages.
Mechanics section
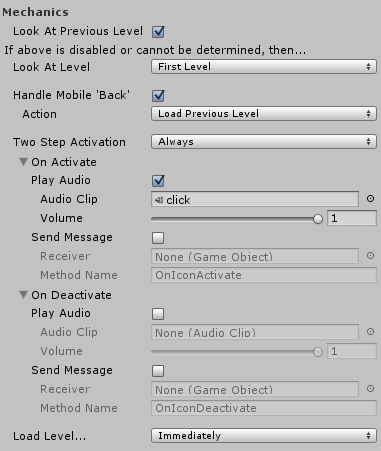
Here you can setup how grid script will behave.
- Look At Previous Level – When selected it will try to look at the previous played level. This will only succeed if player just went back to level select screen from level scene. If it fails then…
- Look At Level – Defines the level type to look at at the start. You can also do it manually using the Layout API.
- First Level – Will look at first level on first page.
- Last Unlocked – Will look at last unlocked level in level order. If there’s none, will look at the first level instead.
- Last Completed – Will look at last completed level in level order. If there’s none, will look at the first level instead.
- Handle Mobile ‘Back’ – Sets the behavior for back button on mobiles (e.g. Android). The options are:
- Load Previous Level – Will load previous level from the Level Configuration from the current one. For instance if you will set Main Menu level right before Level Select level, pressing the back button will load the Main Menu.
- Load Specified Level – Will load level of specified name (a new level name entry will appear).
- Two Step Activation – Allows icons to be activated in 2-step manner. Usable if you want icon to pop-up when pressed the first time, and load a level when pressed the second time. Pressing elsewhere on the screen will cancel the activation process.
- Disabled – Pressing or clicking on the icon first time will load the level immediately.
- Only On Mobiles – On mobiles pressing the icon first time will invoke the focus event, second time will load the level.
- Always – 2-step activation enabled on all devices.
On Activate and On Deactivate subsections
These one are used only when 2-step activation is enabled. On Activate actions are invoked when icon is activated, On Deactivate actions are invoked when user touches the second time something else than the activated icon.
- Play Audio – Plays audio clip.
- Send Message – Send message using GameObject.SendMessage method. The receiver prototype looks like this:
void OnIconActivate(MadLevelIcon icon) {
    // action code here
}
Load Level
Here you can choose what to do when a level is about to be loaded. This option works regardless of how Two Step Activation is set up. Available options are:
- Immediately – Will load level when icon is activated (or pressed twice if Two Step Activation is set in that way).

- With Delay – Will load level after defined number of seconds. Useful for animations.
- Delay – Number of seconds to wait before loading a level.
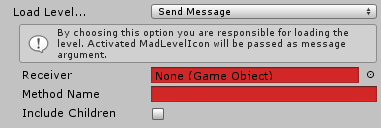
- Send Message – Won’t load a level, but instead will send a message using Unity SendMessage() feature.
- Receiver – Game Object that will receive the message.
- Method Name – Name of the method that will be called.
- Include Children – Broadcast this message over all children of given game object.
The receiver prototype looks like this:
void OnLevelLoad(MadLevelIcon icon) {
    // do something fancy here
    // or just load the level:
    MadLevel.LoadLevelByName(icon.level.name);

    // you can also pass the level name something further to load it later
    // like after displaying a popup window
}
Debug section

This is the last section with only one Hide Managed option. Normally Grid Layout script will hide from you objects that you shouldn’t touch. If you disable this option you can take a look how generated scene is built.